Simple Scene Switcher in Godot 🕹️

Introduction
Scene management is a fundamental aspect of game development. Whether you’re creating a menu system, transitioning between levels, or building a complex game world, you need a reliable way to switch between scenes. In this tutorial, we’ll create a simple yet effective scene switcher for Godot.
Here you can see an example of what we will achieve:
Prerequisites
Before we begin, make sure you have:
- Godot 4.x installed (this tutorial uses Godot 4, but can be adapted for Godot 3)
- Basic understanding of GDScript
- Familiarity with Godot’s node system
What We’ll Build
We’ll create a SceneSwitcher singleton (autoload) that handles:
- Loading scenes by path
- Smooth transitions between scenes
- Optional fade effects
- Error handling
Step 1: Creating the SceneSwitcher Script
First, let’s create our main SceneSwitcher script.
For better organization, we will create the script in a new folder called autoloads inside the res:// directory.
# scene_switcher.gd
extends Node


func switch_to(p_scene_path: String) -> void:
    assert(FileAccess.file_exists(p_scene_path), "Scene path does not exist: %s" % p_scene_path)

    var error: Error = get_tree().change_scene_to_file(p_scene_path)
    assert(error == OK, "Failed to switch scene to: %s" % p_scene_path)
This is the basic structure of our SceneSwitcher. The switch_to function takes a scene path as an argument, checks if the file exists, and then changes the scene using Godot’s change_scene_to_file method. It also handles errors gracefully. However, this is just the starting point. We will enhance it with transitions in the next steps.
Step 2: Setting Up the Autoload
Now we need to register our SceneSwitcher as an autoload singleton. For that, follow these steps:
- In the Godot editor, go to
Project->Project Settings. - Navigate to the
AutoLoadtab. - Click on the
Addbutton. - Select the
autoloads/scene_switcher.gdscript you created earlier. - Set the Node Name to
SceneSwitcher. - Click
Add.

Step 3: Creating Transition Effects
Let’s add some polish with fade transitions. To do this, we’ll create a simple fade effect using a ColorRect node.
We can create the necessary nodes by code:
# scene_switcher.gd
extends Node

var canvas_layer: CanvasLayer
var fade_rect: ColorRect
var fade_duration: float = 0.5
var transition_delay: float = 1.0


func _ready() -> void:
    canvas_layer = CanvasLayer.new()
    canvas_layer.layer = 100  # Ensure it's on top

    add_child(canvas_layer)

    fade_rect = ColorRect.new()
    fade_rect.color = Color(0, 0, 0, 1)

    # Set anchors to cover the entire screen
    fade_rect.anchor_left = 0
    fade_rect.anchor_top = 0
    fade_rect.anchor_right = 1
    fade_rect.anchor_bottom = 1

    # Ignore mouse events
    fade_rect.mouse_filter = Control.MOUSE_FILTER_IGNORE

    canvas_layer.add_child(fade_rect)

    await get_tree().create_timer(transition_delay).timeout

    # Initial fade out
    get_tree().create_tween().tween_property(fade_rect, "modulate:a", 0, fade_duration)


func switch_to(p_scene_path: String) -> void:
	assert(FileAccess.file_exists(p_scene_path), "Scene path does not exist: %s" % p_scene_path)

	var error: Error = get_tree().change_scene_to_file(p_scene_path)
	assert(error == OK, "Failed to switch scene to: %s" % p_scene_path)
At this point, we have a basic fade effect that fades in when the game starts. Next, we need to implement the fade-out effect when switching scenes.
# -- REST OF THE CODE

func switch_to(p_scene_path: String) -> void:
	assert(FileAccess.file_exists(p_scene_path), "Scene path does not exist: %s" % p_scene_path)

    # Fade In
    await get_tree().create_tween().tween_property(fade_rect, "modulate:a", 1.0, fade_duration).finished

	var error: Error = get_tree().change_scene_to_file(p_scene_path)
	assert(error == OK, "Failed to switch scene to: %s" % p_scene_path)

    await get_tree().create_timer(transition_delay).timeout

    # Fade Out
    get_tree().create_tween().tween_property(fade_rect, "modulate:a", 0, fade_duration)
Step 4: Using the SceneSwitcher
Now that we have our SceneSwitcher set up, we can use it to switch scenes from anywhere in our game since it’s an autoload singleton which means we can access it globally using SceneSwitcher object.
Testing the Scene Switcher
We will setup a simple use case, we will create two scenes: FirstScene.tscn and SecondScene.tscn. Each scene will have a button that, when pressed, will switch to the other scene using our SceneSwitcher.
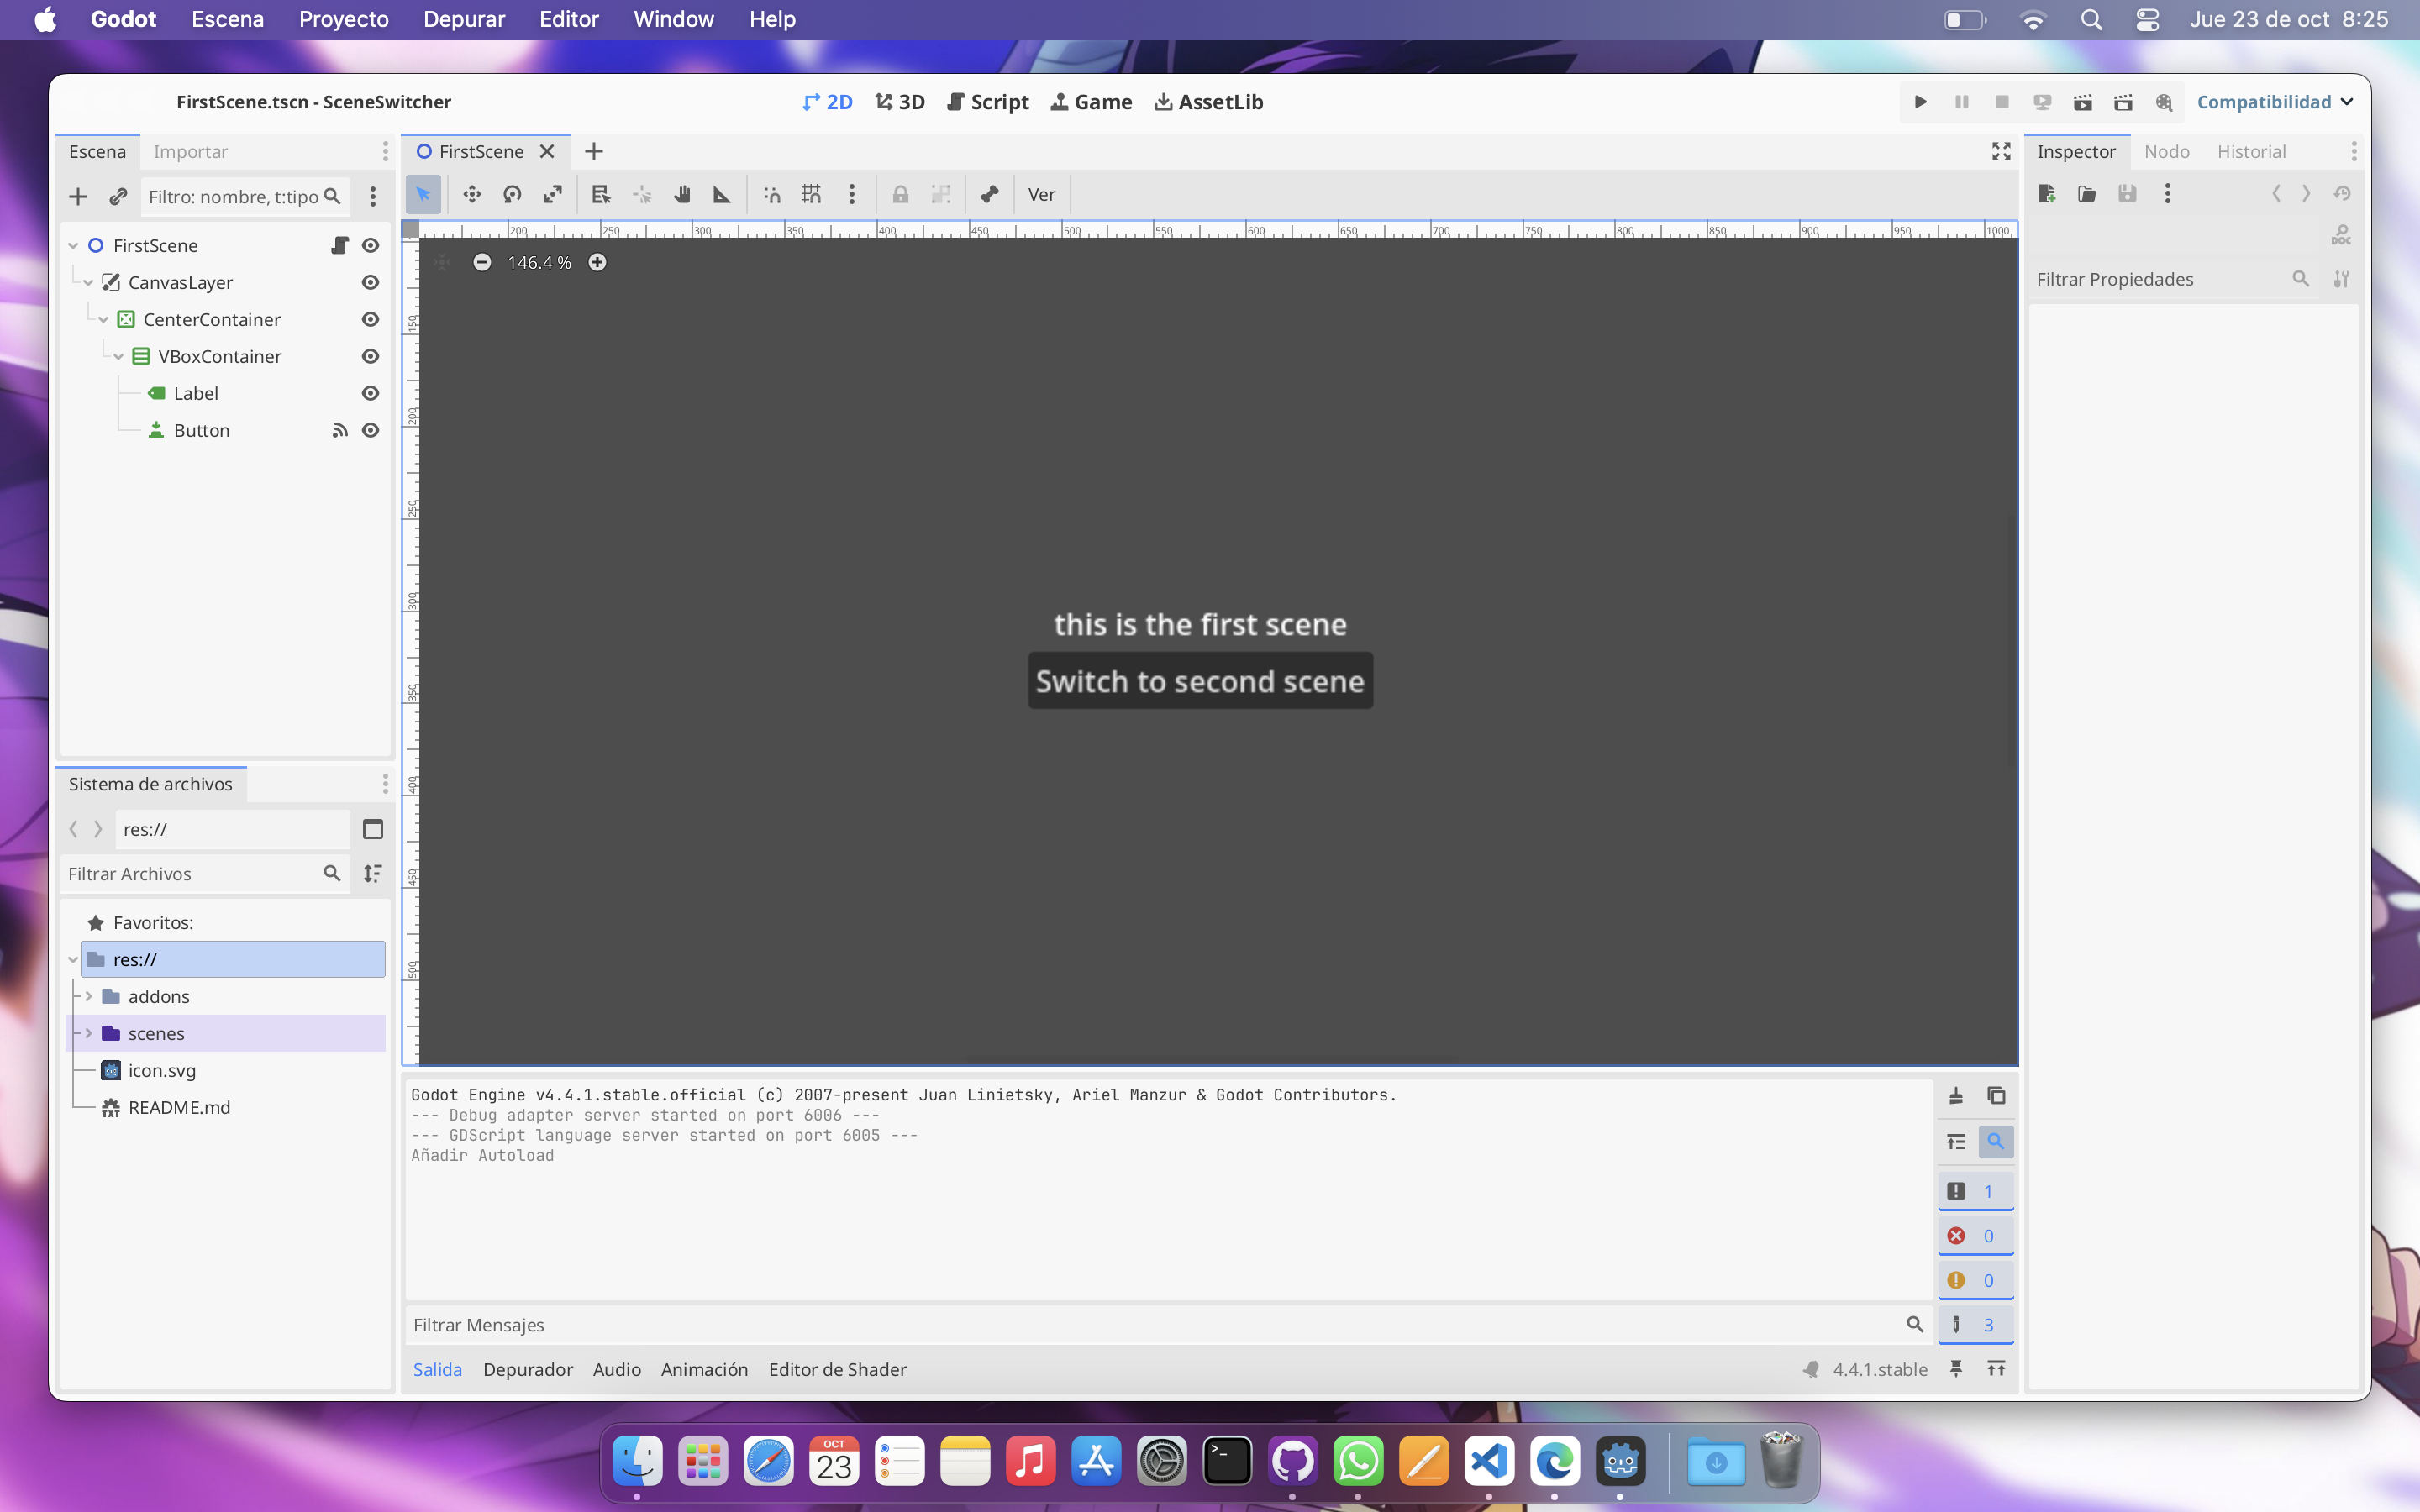
Here you can see the first scene setup:

And here is the second scene setup:

The code for the button in the FirstScene would look like this (you need to attach this script to the scene root):
# first_scene.gd
extends Node2D

func _on_button_pressed() -> void:
	SceneSwitcher.switch_to("res://scenes/second_scene/second_scene.tscn")
And the code for the button in SecondScene would look like this (you need to attach this script to the scene root):
# second_scene.gd
extends Node2D

func _on_button_pressed() -> void:
SceneSwitcher.switch_to("res://scenes/first_scene/first_scene.tscn")With this setup, you can now switch between the two scenes with a smooth fade transition just as we see in the video above.
Additional Features
Finally, we will add one more feature: Emit a signal when fade transition finish. This could be useful for triggering events after a scene has fully loaded. So, here is the full code updated:
# scene_switcher.gd
extends Node

signal finished

var canvas_layer: CanvasLayer
var fade_rect: ColorRect
var fade_duration: float = 0.5
var transition_delay: float = 1.0


func _ready() -> void:
	canvas_layer = CanvasLayer.new()
	canvas_layer.layer = 100  # Ensure it's on top

	add_child(canvas_layer)

	fade_rect = ColorRect.new()
	fade_rect.color = Color(0, 0, 0, 1)

	# Set anchors to cover the entire screen
	fade_rect.anchor_left = 0
	fade_rect.anchor_top = 0
	fade_rect.anchor_right = 1
	fade_rect.anchor_bottom = 1

	# Ignore mouse events
	fade_rect.mouse_filter = Control.MOUSE_FILTER_IGNORE

	canvas_layer.add_child(fade_rect)

	await get_tree().create_timer(transition_delay).timeout

	# Initial fade out
	await get_tree().create_tween().tween_property(fade_rect, "modulate:a", 0, fade_duration).finished
	finished.emit()


func switch_to(p_scene_path: String) -> void:
	assert(FileAccess.file_exists(p_scene_path), "Scene path does not exist: %s" % p_scene_path)

	# Fade In
	await get_tree().create_tween().tween_property(fade_rect, "modulate:a", 1.0, fade_duration).finished

	var error: Error = get_tree().change_scene_to_file(p_scene_path)
	assert(error == OK, "Failed to switch scene to: %s" % p_scene_path)

	await get_tree().create_timer(transition_delay).timeout

	# Fade Out
	get_tree().create_tween().tween_property(fade_rect, "modulate:a", 0, fade_duration)
	finished.emit()
Hipothetically, you can now connect to the finished signal from any scene to perform actions after the transition is complete:
# any_scene.gd
extends Node2D

func _ready() -> void:
    SceneSwitcher.finished.connect(_on_scene_switch_finished)


func _on_scene_switch_finished() -> void:
    print("Scene switch completed!")
Conclusion
You now have a functional scene switcher that you can use in any Godot project! This foundation can be extended with additional features as your game grows in complexity.
SceneSwitcher Addon
Also we have prepared a plug-and-play godot addon with the complete SceneSwitcher implementation, which you can download from our GitHub repository: SceneSwitcher Addon. This addon will be available in the Godot Asset Library soon.
Resources
Happy game development! 🎮
Eduardo
CEO at Pandita Studio. Senior software and game developer (C++, Python, Java, web, Godot). Digital illustrator and university lecturer.